Tuesday 19 February 2013

DIY Simple Belt Extension

I wear very few accessories; the only thing that I have a passion for really is sunglasses. Just lately though, I've developed a love of belts. Being a curvy woman, I find that belts are essential to bringing in my waist. Even when belts have surpassed their time, I still find other uses for them (they make wonderful bag straps, for example). Even though I am a big lass, I wasn't always this way and, as a result, I have loads of belts from when I was smaller that simply won't go around my middle anymore. So, what do you do when a belt no longer fits? Throw it out? Heck no!

You will need: Your too-small belt, a length of ribbon (I used 1metre, brought after christmas for 35p, score!), scissors, and a sharp knife. You could also use some chalk if you wanted to mark out the lines before you make the cuts.


Step 1: Decide what part of the belt you want to keep (for me, it was the studded part), and cut off the rest. At the very lest, cut off the buckle from one end and the buckle holes from the other.


Step 2: Using the knife, make a small slit in both ends of the belt, thread the ribbon through.


I had some "help" with this project.


All done. It really is that simple. Just tie the ribbon in a bow behind your back to wear the belt.


The beauty of this project is that you can change the ribbon at any point to match the colour to your outfit.

Total cost: 35p
Total time spent: 10 minutes.

Friday 15 February 2013

About time, Dolly!

Remember my friend who gave me a whole bag of vintage fabrics? Well to return the favour, I said I'd finish off one of her old projects for her.


The doll was already sewn when this was given to me, as were her arms and legs. The clothes were all on one sheet of fabric. I don't have a picture of them at an earlier stage because I wasn't going to blog this (as it's hardly something I made myself and the pattern was all laid out for me), but then I saw this...


1981! I kind of felt sorry for poor little dolly when I saw this. She's older than me (only just), and she's spent her whole life in a drawer. I figured I'd put her on the internet so that she can see a bit of the world.

And here she is...


She's been waiting more than thirty years to get dressed, hope she's warm now!

I wonder if there are many more of these still around.


Monday 11 February 2013

DIY - Denim skirt to Bag

It's been some time since my last project. The reason for this is that I just can't seem to figure out how to thread my new sewing machine. I even dragged my Mum over to my house, since she's had the machine herself for the last decade, and she doesn't know how to thread it either! So, it's back to sewing by hand; for now at least.

This project makes use of a few things that no longer fit; namely a denim skirt, a belt, and a vest top (but a tshirt would also work).


You will also need some ribbon, scissors, pins, and a needle and thread (or a sewing machine if you are more fortunate than I).

Step 1: Turn the skirt inside out, line up the waistband, and pin it closed. This stops it from moving around during your project.


Step 2: cut off the hem from your skirt to make it even on both sides; then sew it closed.


Step 3: Open up the vest top (or tshirt. if that is what you are using), and lay the skirt inside. Pin the bottom edge of the vest to the bottom edge of the skirt waistband.


Step 4: Using the skirt as a guide, cut the vest to the same size.


Step 5: Unpin the vest so that it is seperate from the skirt, turn it inside out, and sew up the raw edges.


Step 6: Turn the skirt the right way out, push the vest inside, and once again pin to the bottom of the waistband. Sew in place all of the way around.


Step 7: Sew the belt on to serve as a strap. Sew on to both sides, making sure it isn't twisted before you stitch it down.


Step 8: Run your ribbon through the belt loops, pull tight and tie to serve as a draw string.


All done!


Total cost: £0.00
Total time spent: 2 hours, due to hand sewing.


Friday 1 February 2013

DIY - Fabric Covered Shoes

What a joyous thing a new pair of shoes can be. Every woman knows that finding that beautiful pair, taking them home and planning an outfit around them can make shoes one of the most fun and versatile accessories you can buy.
But what if you can't afford new shoes? Do you just make do without? Not my way! I took an old pair of boring, plain black ballet pumps that I haven't worn in years and turned them into vintage inspired delights with the help of a little fabric and some glue.


Gather your supplies. You need old shoes, strong glue, scissors, an elastic band (not pictured), and fabric of your choice. You need to be able to lay the fabric over both shoes and have it touch the floor on either side and in the middle.


Step 1: Remove the bows. If you want to, you can save them to re-attatch later, but mine were too damaged by the removal.


Step 2: drape the fabric over the whole shoe and trim it back a little so that you don't have too much overhang.


You need to leave enough fabric to cover the sides, a good trick is to pinch it at the base.


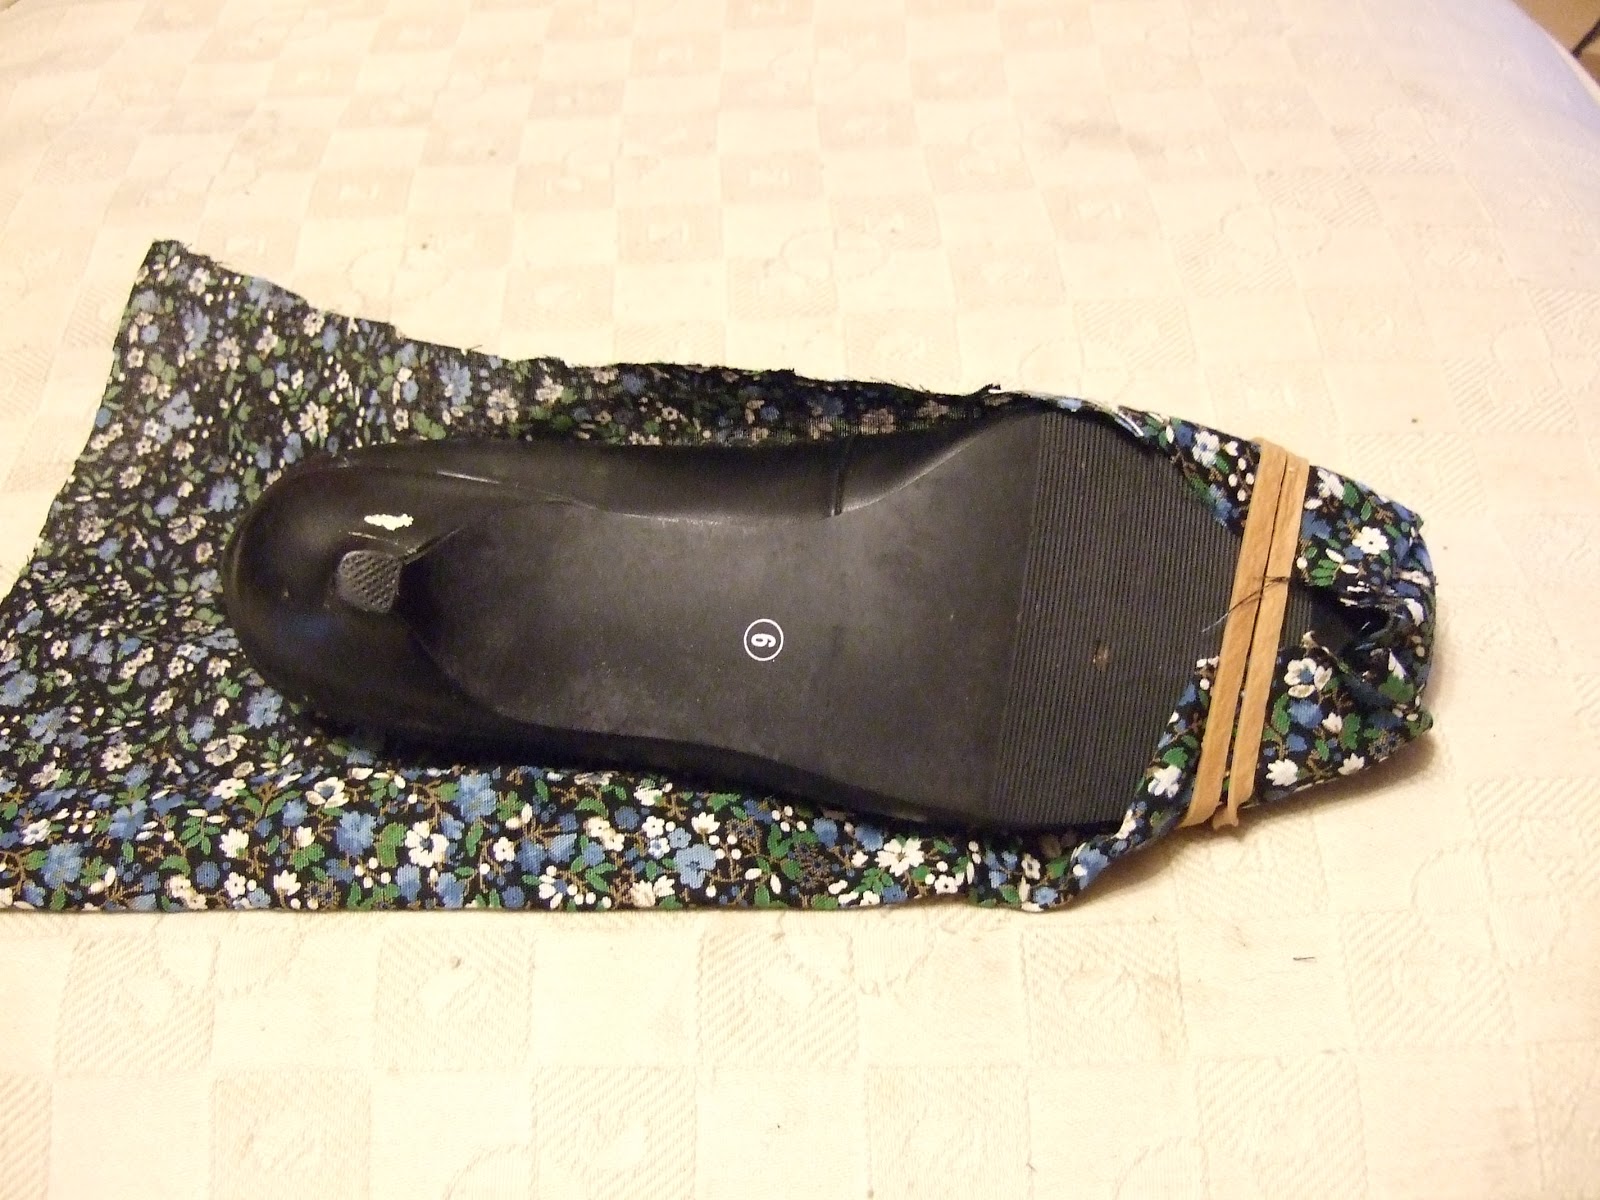
Step 3: Tie an elastic band around the toe, just to keep the fabric in place for the next step.


Step 4: Starting at the heel, make a slit up the full length of the fabric, stopping about a centimetre before you touch the shoe.


Step 5: The messy part! Starting at the toe, apply glue to the shoe and press down the fabric, smoothing it down as much as you can as you go.


It's easier to work a bit at a time rather than apply glue to the whole shoe at once. Work your way down the shoe, crossing the fabric over itself a little at the back.


Step 6: Once the whole shoe is covered and the glue is dry, work your way around the top. Make small slits in the fabric so that it will fold under, add some glue to the inside of the shoe, and pull the fabric under and in, pulling tight and tucking in as you go.


Step 7: Trim around the base of the shoe, adding more glue if needed.


And there we have it, another project done and a new pair of shoes for no money at all!


Total cost: £0.00
Total time spent: 2 hours