Saturday 30 November 2013

Christmas on a Budget - DIY Lace Napkin Rings

Don't you just love Christmas Dinner? Everyone sitting around the table, dressed in their best, topped off with the silly paper hats from the crackers; which are, of course, mandatory. The effort made at christmas is never matched through the rest of the year. The best china, candles, who does those things day to day? Of course, it's all those little touches which make the day special. So today, we are making one of those special little touches to make your table unique.

Today, we are making napkin rings:


You will need: Some lace trim, cardboard toilet roll tubes, baking paper, scissors, PVA glue (make sure you get the kind that DRIES CLEAR), a paintbrush, some pins, a pot to pour your glue into, tape (not pictured), and this one could get messy, so you might want some newspaper to protect your surface.


Step 1: wrap your toilet roll tubes in the baking paper (shiny side out), and secure in place with tape.


Step 2: Prepare your lace. The trim I used (because I already had this, and didn't want to go out and buy extra when this would work), was a little too wide for the job. So I cut out the middle and used both outer edges for this project. You may not need to do this, depending on your lace.


With the middle taken out, and the pieces laid together, it now looked like this:


Step 3: Wrap your lace around the toilet roll tube and cut off the excess, leave a slight overlap though.


Step 4: Add a few pins to keep your lace in place.


Step 5: Generously paint your lace all over with the glue.


Step 6: When the lace is completely covered in a thick layer of glue, stand the tube on it's end and proceed to repeating the steps to make as many as you need.


Standing the tube upright like this will prevent it from sticking to anything as it dries.

Step 7: Leave to dry OVERNIGHT

Step 8: In the morning, when the glue is dry, take out the pins, slide the toilet roll tube out from the middle, and then use your fingers to gently pry the lace away from the baking paper.


The glue will dry hard and leave you with a nice, delicate looking, lace napkin ring. So easy, yet very effective!


Ready to set the table at Christmas!


Total cost: £0.00
Total time spent: 10 minutes per ring, plus overnight to dry.

Sunday 24 November 2013

Christmas on a Budget - DIY Button Ornaments

Here we go again folks, with a nice and simple, no sew project that would be a good one for the kids to help with.

Today, we are making these:


Fun, cute, and easy peasy!

For the Tree

You will need:
Green felt, 20 green buttons, strong glue, scissors, a small length of ribbon, and some things to decorate (I used some small yellow buttons, some nail decorations, and a star shaped button I managed to score from my Mother's button box). You will also need pliers or jewellery nippers to clip the shank off the back of your star button if necessary.


Step 1: arrange your buttons on the felt before you start, just to make sure they look right before you start to glue them down. Start with a row of 2, then 3, then 4 etc. The bottom row should be 6 buttons long.


When you are happy with your arrangement, it's time to get sticky!

Step 2: We are starting with the bottom line first. Draw a line of glue along your felt, the same length as 6 buttons.


Step 3: Place your row of 6 buttons onto the glue line.


Step 4: Draw another line of glue above this line, make it shorter than your first line as this is for 5 buttons. Place your buttons on the line.


Step 5: Continue adding lines of buttons, taking one button away for each line, until you are finished with a top row 2 buttons long.


Step 6: If your star shaped button has a shank, clip it off with your pliers, and then glue it to the top of your tree.


Step 7: Decorate your tree using your other buttons, or nail gems, or glitter... anything you like really. It's christmas, go nuts!


Step 8: Trim around the outside of your tree.


Step 9: Turn the tree over, and glue a loop of ribbon to the back.


Leave alone for a while so that the glue has time to dry, and that's your first one done!

Total cost: less than 50p
Total time spent: 10 minutes plus drying time.

For the Wreath

You will need: Green felt, green buttons, ribbon, scissors, glue, a marker pen, and something round to draw around (I used a candle, but a drinking glass would be fine)


Step 1: Draw around your candle/glass/whatever you are using, onto the felt and cut out the circle.


Step 2: fold your circle in half, and cut a semi-circle shape out. It doesn't need to be perfect.


Step 3: Open out your shape, you should have a ring of felt that looks like this:


Step 4: Add a line of glue around your ring, it looks better if you go further towards the inner edge of the ring.


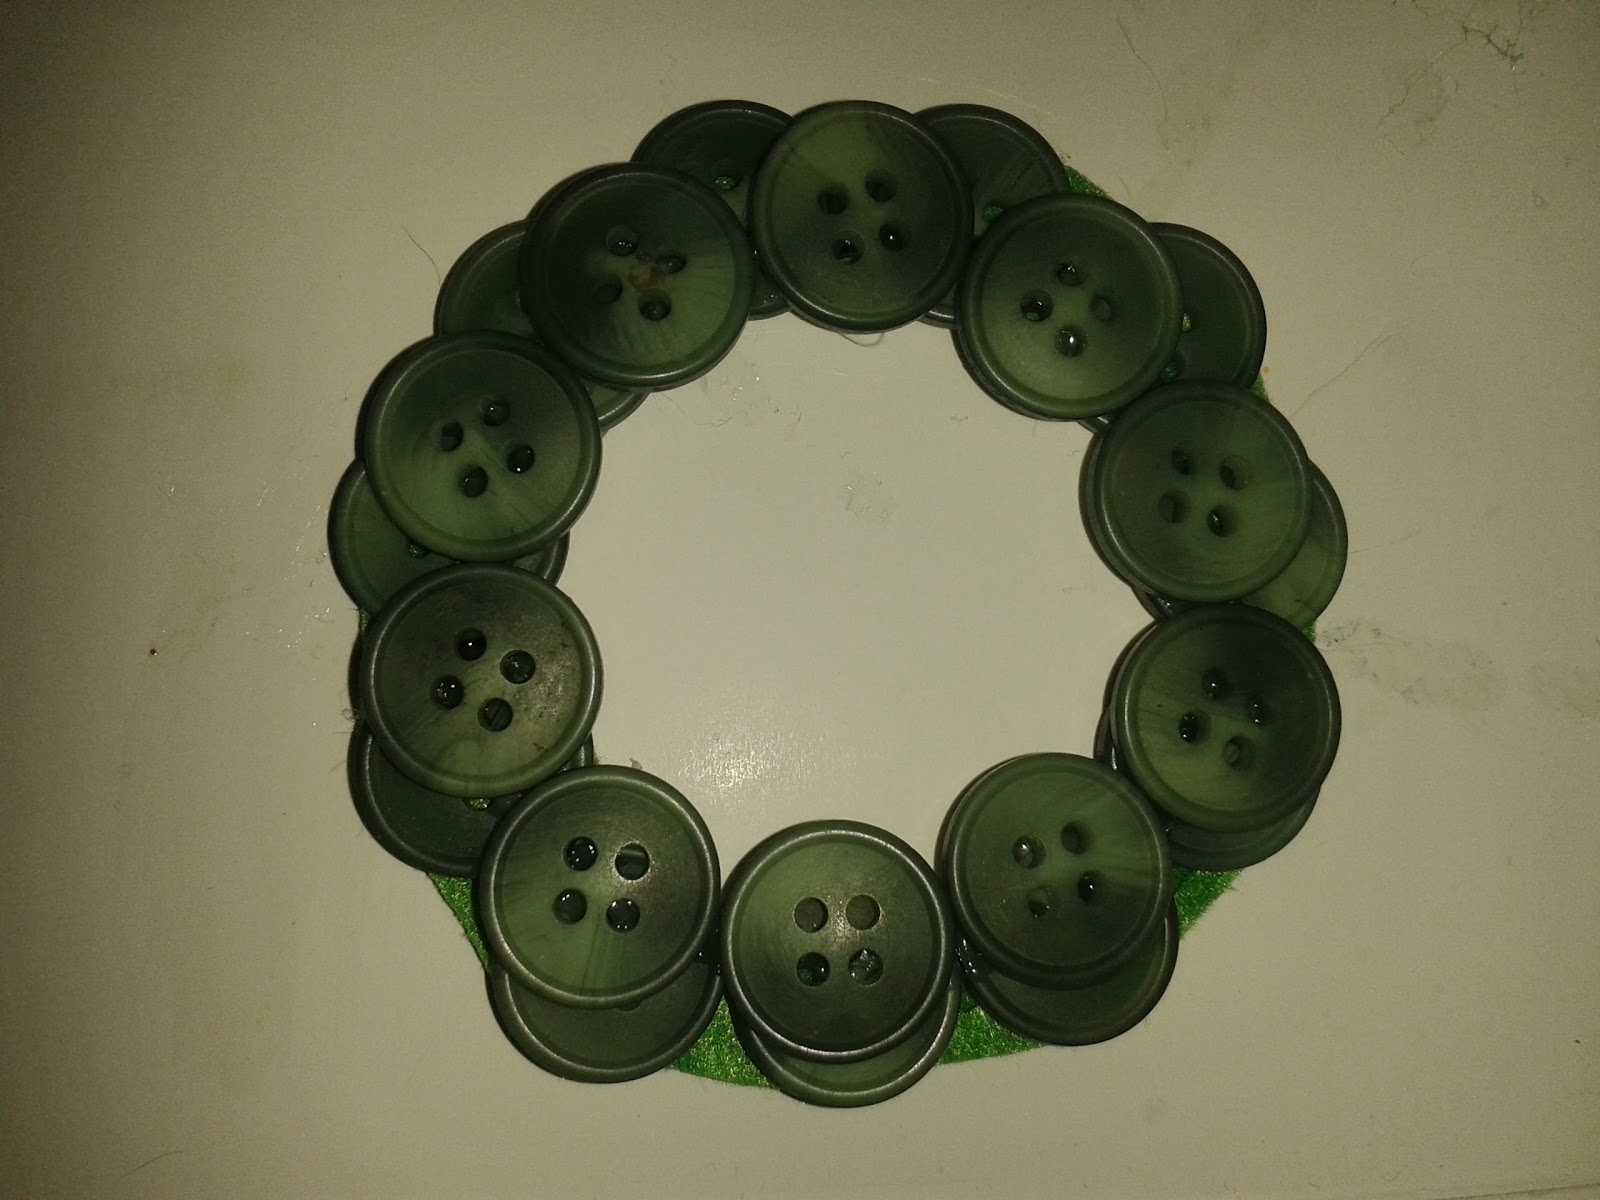
Step 5: Place your buttons onto your glue line. I can't tell you how many you will need, it depends on the size of your buttons. When you place them, make sure that they very slightly overhang the inner edge of your ring.


Step 6: When the glue is dry enough, turn your wreath over, create a ring of felt as before, and glue it to the back of your wreath. This will strengthen it a little; after all, nobody likes a floppy wreath!


Step 7: Trim the felt for around the edge of your wreath, cutting as close to the buttons as you can.


Step 8: Working again with the front of your wreath, add a line of glue on top of your buttons, and add a second layer of buttons. DON'T line them up with your first layer, it looks so much better if you offset them!


Step 9: Tie a small length of ribbon into a bow and glue it to your wreath.


Step 10: Glue a loop of ribbon onto the back of your wreath.


Allow the glue to dry, and you're done with this one too!

Total cost: less than 50p
Total time spent: 10 minutes plus drying time.

Ready to hang as soon as the tree goes up.


Sunday 17 November 2013

Christmas on a Budget - DIY Beaded Tree Ornaments

Back once again with a brand new shiny! This time we are making this:


Beaded spiral ornaments for your tree. This make is super simple, and a good one to get the kids involved with. It would also make a cute homemade gift if you put together a box of around 6 of them in complimenting colours.

You will need: Craft wire (around 30cm per ornament), beads, a choice of ribbons. Also, scissors, tape, and cardboard for your template.


Step 1: Cut off around 30cm of wire. If you are using craft wire, then it should cut easily with scissors.


Step 2: Tie a tight knot in one end of the wire.


Step 3: String the wire with beads of your choice. I went with 6 of one colour, 2 of the other, but you can follow any pattern and colour you wish.


Step 4: When the wire is fully beaded (with around 5cm left free at the end), twist a tight loop into the end of the wire.


Step 5: Take around 10cm of your ribbon and pass through the loop. Tie a knot or a bow into it. This will be used to hang your finished ornament on the tree.


Step 6: Cut a rough rectangle from your cardboard, fold around into a cone shape, and tape into place. This doesn't need to be neat.


Step 7: Take your string of beads, and wind around the cone to make your spiral shape. Simply slide off the end when done.


Be sure to remove all cats from the room unless you want your workspace climbed on when trying to take pictures!


All done.


The pictures don't show these at their best. The catch the light well and really sparkle.

Total cost: Around 5p per ornament (probably less than that!)
Total time spent: 10 minutes per ornament.