
Today folks, we are making this:

Simple, chic, and REALLY cheap, just how I like it!
You will need: A placemat, a length of ribbon or an old belt, a slide buckle, and glue. I used my hot glue gun here, but any strong glue would work.

You should also have something heavy on hand, ready to weigh down the clutch later.
Step 1: Run a line of glue up the length of your placemat along both edges. Stop at around two thirds of the way.

This is where I learned that hot glue dries REALLY fast! So, if like me this is your first time using one, remember to move on to the next step immediately! Stopping to take a picture meant my glue had dried and I had to pick it off and start again.
Step 2: Fold the placemat as shown below, and hold in place until the glue dries. If you aren't using hot glue you may want to weigh it down and wait it out at this stage, or clip clothes pegs along the edge to hold in place whilst drying.

Step 3: lay your belt of ribbon underneath the clutch. I'm using an old belt I've had laying around, but ribbon would work just fine.

Step 4: Fold the top flap of the clutch over so that you can get an idea of what the end result will look like. Use the size of the clutch to determine how long to cut the belt. Leave a few more centimeters than you need though to have room to attach the buckle.


Step 5: With the buckle upside down, pass the belt through the buckle as shown below and fold the edge down. Glue into place.


Step 6: Place the belt back underneath the clutch and make sure that the buckle is in the place where you want it to be. Hold the belt into place and flip the whole thing over. Then place a line of glue underneath the belt to stick it into place.
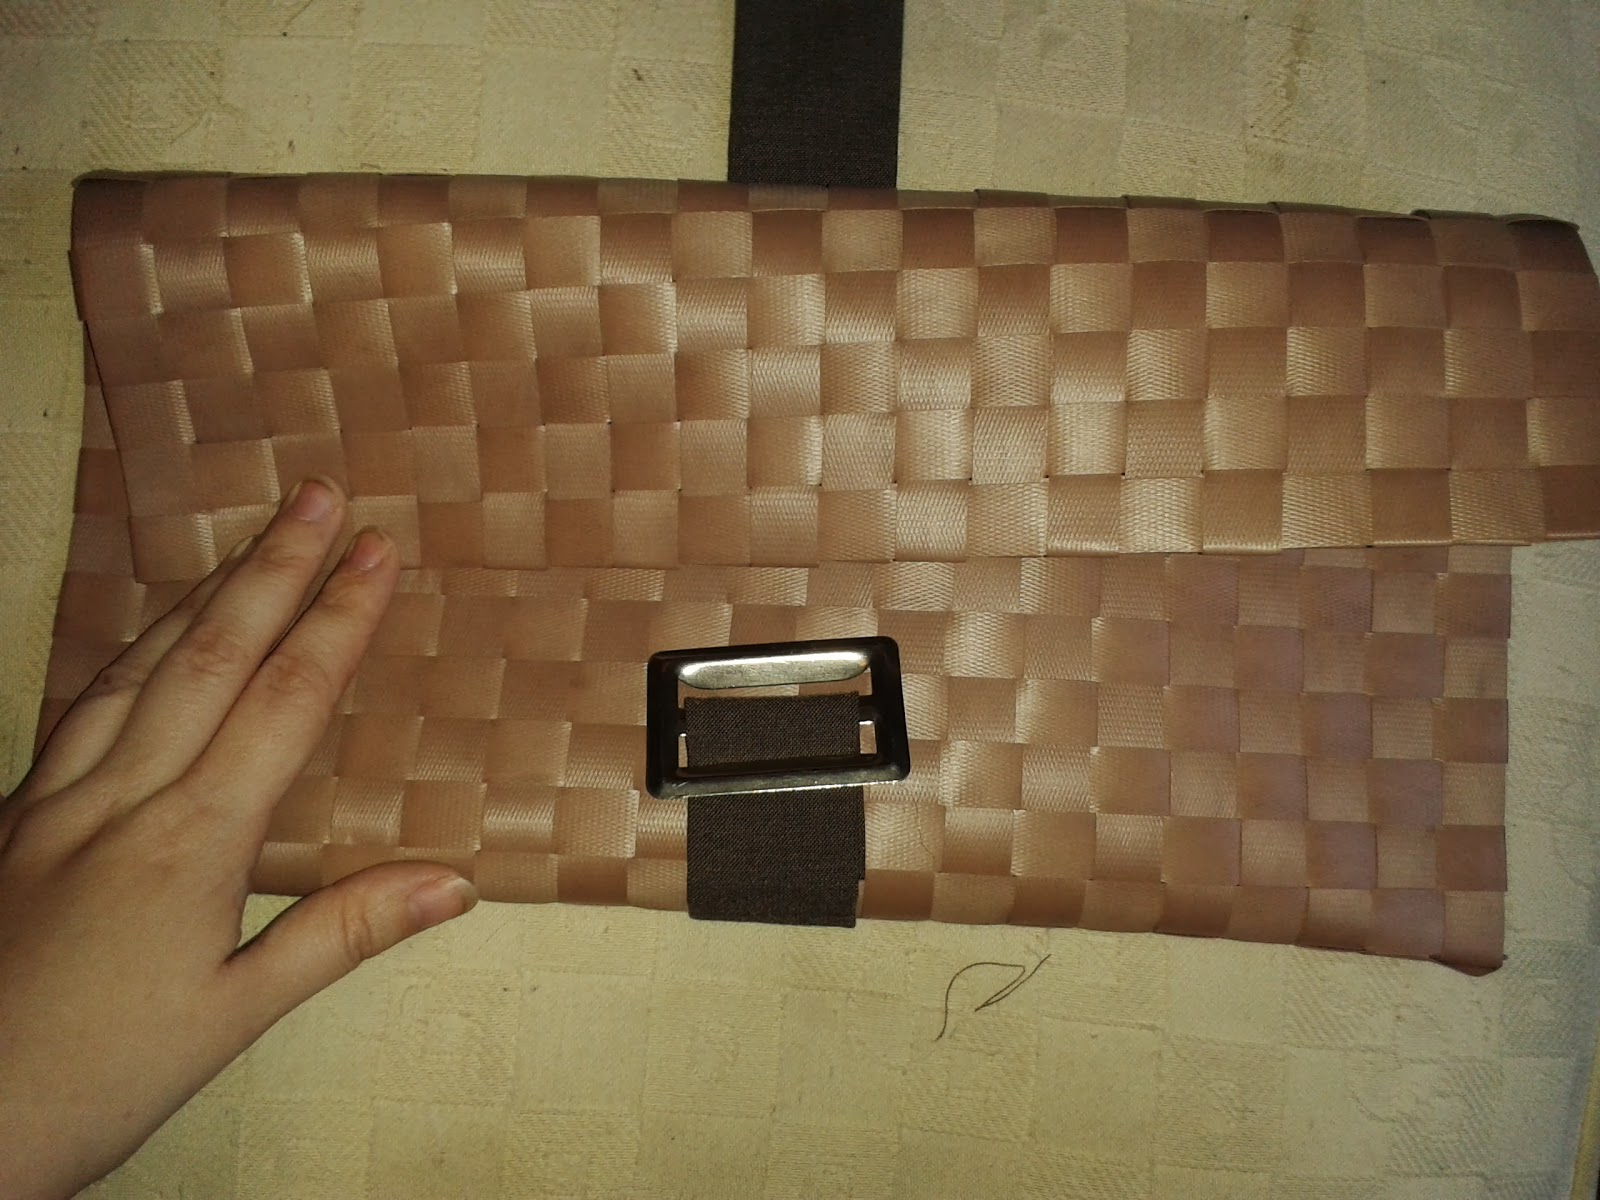

Step 7: Place a little glue under the front part of the belt too.

Buckle up and you're good to go!

Additional step : If you are using a cloth placemat then you probably can skip this step, but as I used a plastic kind, it kept trying to straighten itself out. If you have this problem then a simple remedy is to just place a heavy weight on top of the clutch and leave it overnight.

All done!

Cost: Placemat - 39p
belt - already owned - 0p
buckle - raided from my mother's button tin - 0p
Total cost: 39p
Total time spent: 15 minutes plus overnight to set the shape.
No comments:
Post a Comment